If you are running a WordPress-powered website, its security should be your primary concern. In most cases, WordPress blogs are compromised because their core files and/or plugin are outdated; outdated files are traceable and it’s an open invitation to hackers.
How to keep you blog away from the bad guys for good? For starters, make sure you are always updated with the latest version of WordPress. But there’s more. In today’s post, I’ll like to share with you some useful plugins as well as some tips to harden your WordPress security.
Read Also: 10 WorfPress Plugin to Secure Your Website
1. Changing Default “wp_” Prefixes
Your website might be at stake for some vulnerabilities (e.g. SQL Injection) if you are using the predictable wp_ prefixes in your database tables. The following tutorial teaches you how to get them changed via phpMyAdmin in 5 easy steps.
2. Hide login error messages
Error login messages may expose and give hackers an idea if they’ve gotten username correct/incorrect, vice versa. It is wise to hide it from unauthorized login.
To hide login error messages, you can simply put the following code in functions.php
add_filter( 'login_errors', '__return_false' );
3. Keep wp-admin Directory Protected
Keeping “wp-admin” folder protected adds an extra layer of protection. Whoever attempts to access files or directory after “wp-admin” will be prompt to login. Protecting your “wp-admin” folder with login and password can be done in several ways:
- WordPress plugin – Using the WordPress HTTP Auth.
- cPanel – If your hosting supports cPanel admin login, you can set protection easily on any folder via cPanel’s Password Protect Directories graphical user interface. Find out more from this tutorial.
- .htaccess + htpasswd – Creating a password-protected folder can also be done easily by setting the folders you want to protect inside .htaccess and users allowed to access inside .htpasswd. The following tutorial shows you how to do it in 7 steps.
4. Maintaining Backups
Keeping backup copies of your entire WordPress blog is as important as keeping the site safe from hackers. If all fails, at least you still have the clean backup files to revert. There are two types of backup practice: Full Backup and Incremental backup.
The “full backup” will include everything within the site including the files and database when creating the backup. This method it’ll take space more than necessary, and may cause a spike on CPU and disk usage when performing the backup. So it’s not quite recommended if your site got limited resources.
The “incremental” backup on the other hand will take the full only the first time and will only take backup of the recently changed items thus more efficient. Today there are a number of options for this type of backups in WordPress with a fair amount of fees such as VaultPress and WP Time Capsule.
Furthermore, we’ve also previously covered a list of solutions to backup your WordPress files and database, including both useful plugins and backup services.
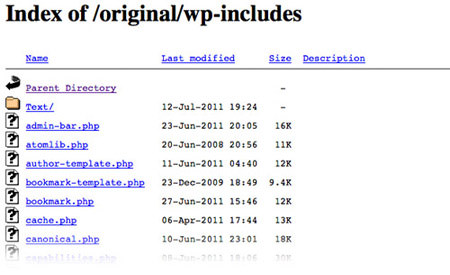
5. Prevent Directory Browsing
Another big security loophole is having your directories and its files exposed, and accessible to public. Here’s a simple test to check if your WordPress directories are well protected:
- Enter the following URL in browser, without the quotes. “
http://www.domain.com/wp-includes/“
If it shows blank or redirect you back to home page, you are safe. However, if you see screen similar to the image below, you are not.
To prevent access to all directories, place this code inside your .htaccess file.
# Prevent folder browsing.
Options All -Indexes
If your site running on nginx, you can add the following instead.
autoindex off;
6. Keep WordPress Core Files & Plugins updated
One of the safest ways to keep your WordPress site safe is to make sure your files are always updated to the latest release. Fortunately, WordPress today comes with an automatic update turned-on, so as soon as there’s a security patch available, your site should be immediately updated. Just make sure that you or your developer did not have it turned off.
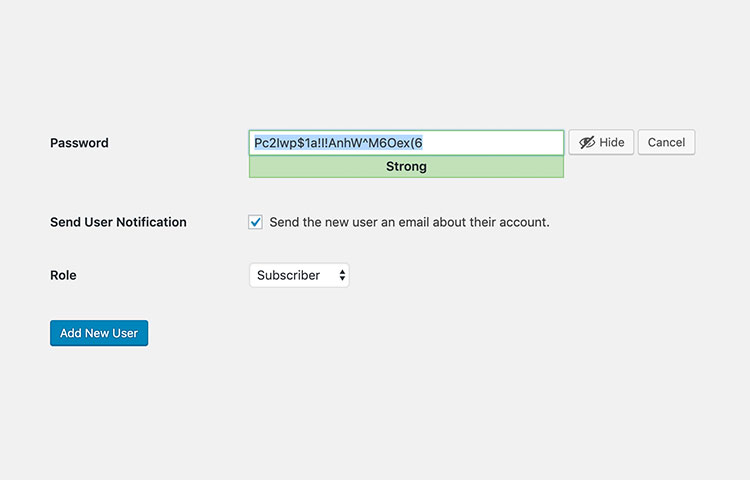
7. Pick a Strong Password
WordPress now comes with a strong password suggestion field that looks like below when creating a new account or updating to a new password. It will indicate whether your password is Strong or Weak. You should pick the Strong password for sure. But the downside of having a strong password is that it’s not easily memorizeable. That’s why I recommend to have a password manager like 1Password or LastPass
8. Remove Admin User
A typical installation of WordPress comes with a default user named “admin”. If that’s the username to your WordPress site, you are already making hacker’s life 50% easier. Using user “admin” should be avoided at all times.
A safer approach to logging into your admin securely is to create a new administrator and have “admin” removed. And here’s how you do it:
- Login to WordPress admin panel
- Go to Users -> Add New
- Add a new user with Administrator role, make sure you use a strong password.
- Log out of WordPress, re-login with your new admin user.
- Go to Users
- Remove “admin” user
- If “admin” have posts, remember to attribute all posts and links back to the new user.
9. Disable XMLRPC
XMLRPC in WordPress is a common entry point of attack in WordPress. So it’s always good idea to disable it when your site does not require XMLRPC. You can restrict XMLRPC endpoint to certain IPs in case it’s needed, for example:
Apache
<Files xmlrpc.php>
  order deny,allow
  allow from 192.0.64.0/18
  deny from all
</Files>
Nginx
location = /xmlrpc.php {
  allow 192.0.64.0/18;
  deny all;
  access_log off;
}
10. Add HTTP Security Headers
Adding HTTP security headers will add extra security layer to your site which helps to mitigate certain attacks. The headers will intruct the browser to behave on certain direction set in the headers. For example, the X-Frame-Options will allow you whether your site can be embedded within an iframe. Other type of Headers you can add include: X-XSS-Protection, Strict-Transport-Security, X-Content-Type-Options, Content-Security-Policy, and Referrer-Policy.
Header always append X-Frame-Options DENY
Header set X-XSS-Protection "1; mode=block"
Header set Strict-Transport-Security "max-age=31536000; includeSubDomains; preload"
Header set X-Content-Type-Options nosniff
Header set Content-Security-Policy "default-src 'self';"
Header set Referrer-Policy "no-referrer"
Nginx
add_header X-XSS-Protection "1; mode=block";
add_header Strict-Transport-Security 'max-age=31536000; includeSubDomains; preload';
add_header X-Frame-Options "DENY";
add_header X-Content-Type-Options nosniff;
add_header Content-Security-Policy "default-src 'self';";
add_header Referrer-Policy same-origin;
To add these headers, you might need to reach out to the hosting company where your site is hosted.
Bonus: Subscribe to WPVulnDB
Last but not least, you might want to stay on top of the latest exposed vulnerabilities in WordPress Core, Plugins, and Themes by subscribing to WPVulnDB. It describes what type vulnerability, what it is, what version is affected, and whether it’s already fixed.
If you find one of your plugins, you’re using are on the report, you should can take immediate action to mitigate it and update the plugins when the fix is available immediately.