It is no secret that a surround sound setup can greatly enhance the audio listening and media experience as it offers limitless audio and atmospheric possibilities. However, if you are trying to connect your Windows 10 system to the setup, you might encounter some obstacles.
Apart from meeting the minimum system requirements, the configuration can be a little tricky. In this article, we discuss how to configure and test surround sound on Windows 10.
How can I configure and test surround sound on Windows 10?
Update Sound Card Drivers
- Press Windows Key + R to open Run.
- Devmgmt.msc and click OK to open the Device Manager.
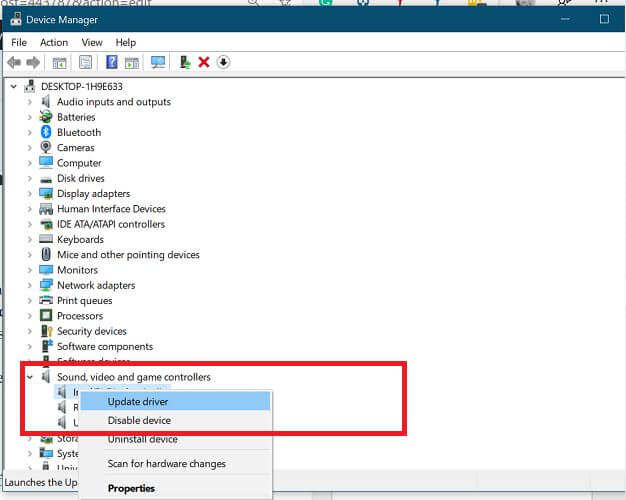
- In the Device Manager, expand the Sound, video and game controllers option.
- Right-click on the sound card to which your surround sound 5.1 setup is connected.
- Select Update Driver.
- Click on Search automatically for updated driver software option.
- Windows will look for any pending driver updates and install them. Once installed, close the Device Manager.
If no updates are found, visit the sound card manufacturer’s website and check for the latest drivers. Updating the sound card is optional, you can proceed even if you don’t find any driver updates.
Did you know that the majority of Windows 10 users have outdated drivers? Be a step ahead using this guide.
Windows can’t automatically find and download new drivers? Don’t worry, we’ve got you covered.
Configure surround sound in Windows 10
- Right-click on the speaker icon in the Windows system tray that you can access by clicking the arrow icon in the taskbar.
- Select the Sounds option. This will open the Sound Control Panel.
- If you don’t see the Sounds option, click on Open sound settings.
- Scroll down and click on Sound Control Panel under Related Settings.
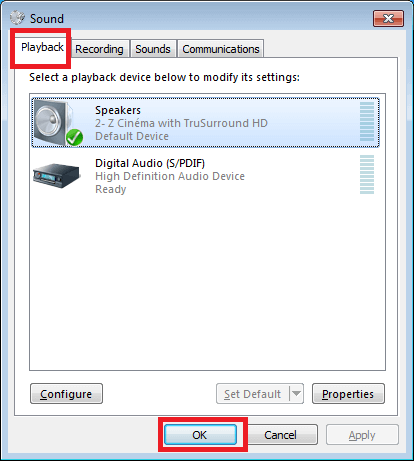
- In the Sounds window, open the Playback tab.
- Select the Surround Sound enabled sound card among the list of audio devices and then click the Set Default button.
- Click on the Configure button.
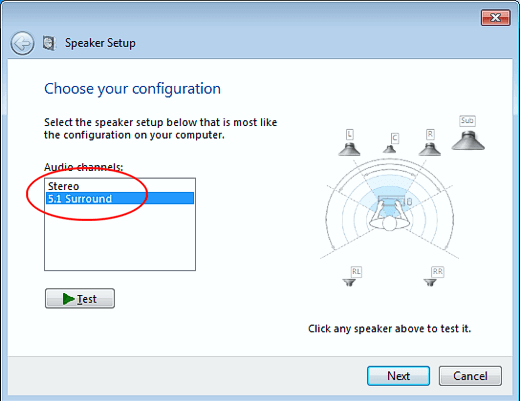
- In the Speaker Setup window, choose 5.1 Surround from the Audio Channels list.
- Click Next to proceed.
- In the Customize your configuration window, check all the boxes for Optional Speakers option.
- Click Next to proceed.
- On the “Select full-range speakers” window, check the box next to the speakers in your setup.
- Click Next and you should see the “Configuration complete” screen.
- Click Finish to save the changes and close the Sound Control Panel.
Test Surround Sound in Windows 10
- Open the Sound Control Panel. Refer to section 1-2 above for steps.
- Open the Playback tab.
- Select the Surround Sound enabled card and click on Configure.
- Make sure the speakers are on and you have set the volume accordingly.
- Click the Test button. Windows will play sounds via the newly set up speakers.
- If everything looks good, open up any video or audio streaming service and check the speakers with your favorite track.
- You can use this YouTube video which can give you a good idea if the speakers are working as they should.
Surround sound audio systems offer immersive gaming and movie-watching experience. By following the steps in this article you can successfully configure and set up your surround sound setup on Windows 10.
If you have any other questions and suggestions, leave them in the comments section below and we’ll check them out.
READ ALSO: